How to change website fonts in WordPress
After you’ve chosen a theme for your WordPress site, you’ll probably want to customise it to make it your own.
One feature that really impacts the look and feel of your website is the use of fonts. If you like the default choice of fonts provided by your theme, then there’s no reason to change it. However, if you prefer, most themes allow you to easily change the choice of fonts of either the headings or body text. Here’s how:
Changing fonts via the Customizer
This is the first option to look for. Themes vary in the options available for customising fonts via the Customizer and you’ll need to check whether your theme provides this option. (Note: the default WordPress themes e.g. Twenty Nineteen and Twenty Twenty don’t offer this option)
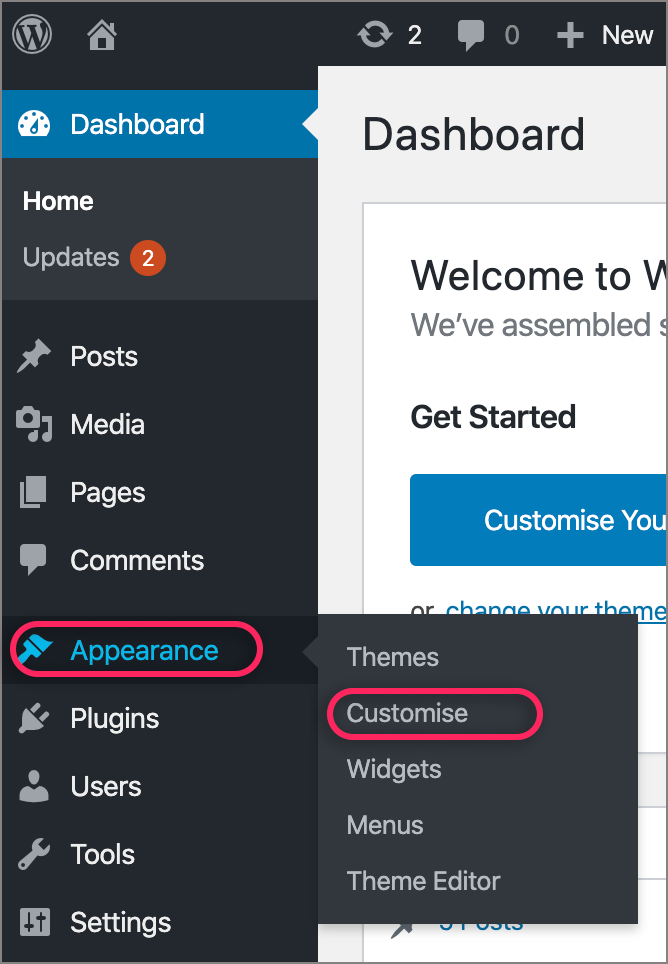
- Log in to your site’s WP-admin by browsing to your domain name followed by /wp-admin e.g. https://example.com/wp-admin
- From the left menu, select Appearance > Customise
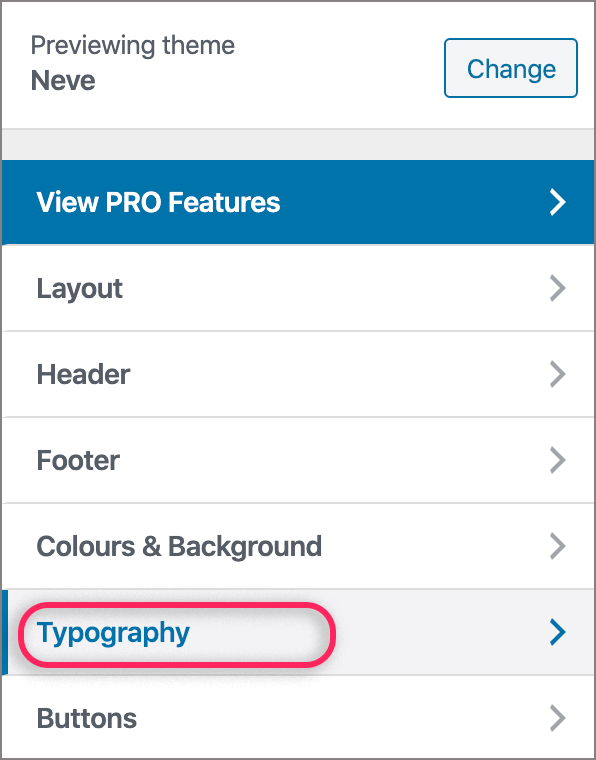
- Your theme’s Customizer will now open, which varies in options and appearance depending on the theme. Look for the option of font or typography
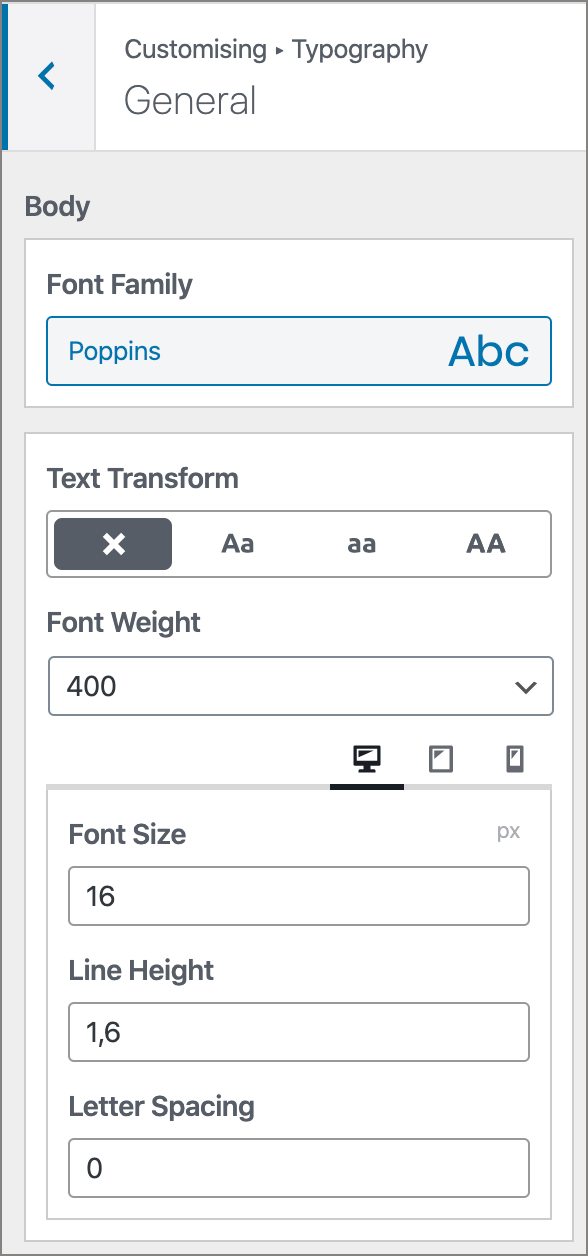
- If either of these options appear, then select these menu items and you will be presented with varying options. As an example, this theme presents a wide range of options: